Demo-Project: “Reviewer” Role to Manage Photos in Laravel
 Povilas Korop
Founder of QuickAdminPanel
Today we will create a Laravel demo-project for reviewing photos, based on a real job from Upwork. Simple CRUD will be pre-generated with our QuickAdminPanel, and then I will provide step-by-step Laravel code instructions with roles-permissions, scopes etc. Let’s go.
Notice: at the end of the article, you will have a link to Github for the whole code.
We start with a simplified job description, taken from Upwork:
Types of users
1) guest: this user can only view the photos that has been approved for viewing
2) registered user: has guest user rights, plus can upload photos to the site
3) reviewer: All rights of a registered user but with rights to review only items placed in his queue for approval .
4) admin: all rights of a reviewer, plus ability to assign task to others for review. Ability to override reviewer, ability to pull image from general view, ability to delete user account
Website function: visitors come to browse images posted by a group of artists. The artist must create an account before he/she can post an image to the site. Images goes into a image repository and will be randomly displayed on the front page.
Let’s try to create something like this in Laravel.
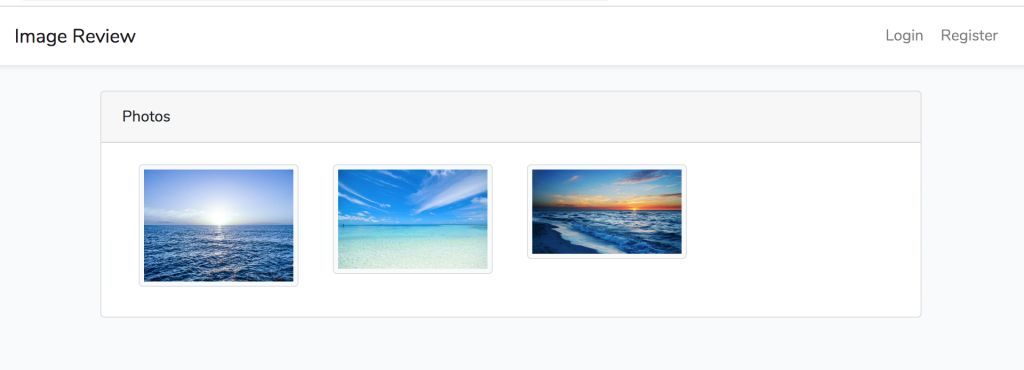
Teaser – our final homepage result will look like this:
These are the steps we will take in this article:
These will be generated by QuickAdminPanel:
1. User management system
2. Photos CRUD menu
Then we will continue adding custom code:
3. Add reviewer role and permission called ‘photo_review’
4. Admin: Assigning a reviewer to each photo in Photo Edit form
5. Menu “Photos for Review” and list of photos to review for a reviewer (will use Eloquent Scopes here)
6. Photos approval – approved_at field and setting it in Photo Edit form
7. Front Homepage showing only approved photos
Step 1. Generate Users/Photos CRUDs with QuickAdminPanel
You don’t have to use our generator, and can create this foundation yourself, but hey – why not save time?
Won’t get into detail here, as it is straightforward, so just a few screenshots:
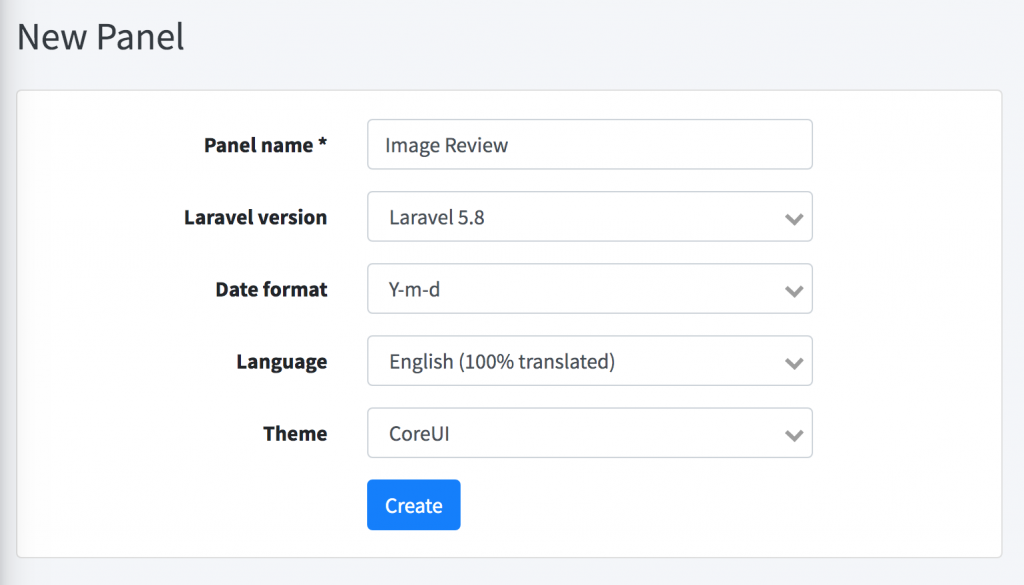
1. New panel
We generate a new project, we will choose CoreUI theme.
2. User management
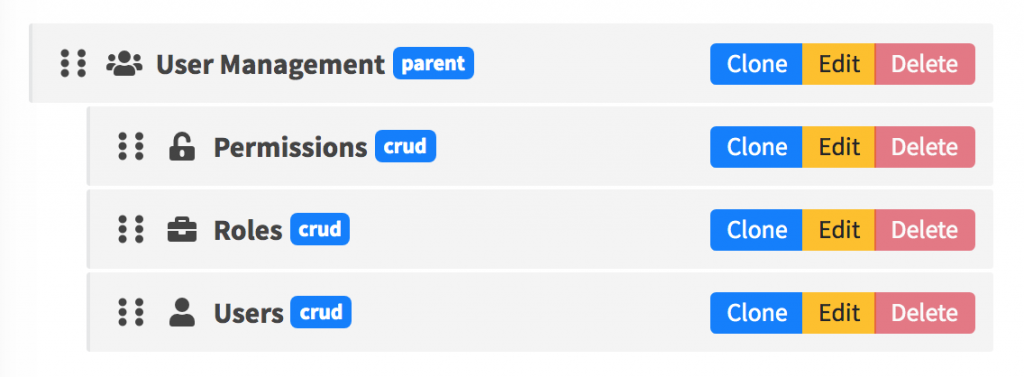
It is generated for us in every default panel, with roles/permissions management, and with two default roles “Admin” and “User”, so we don’t need to change anything here. Later in the article, when we need to add “reviewer” role, I will explain how it works internally.
3. Photos CRUD
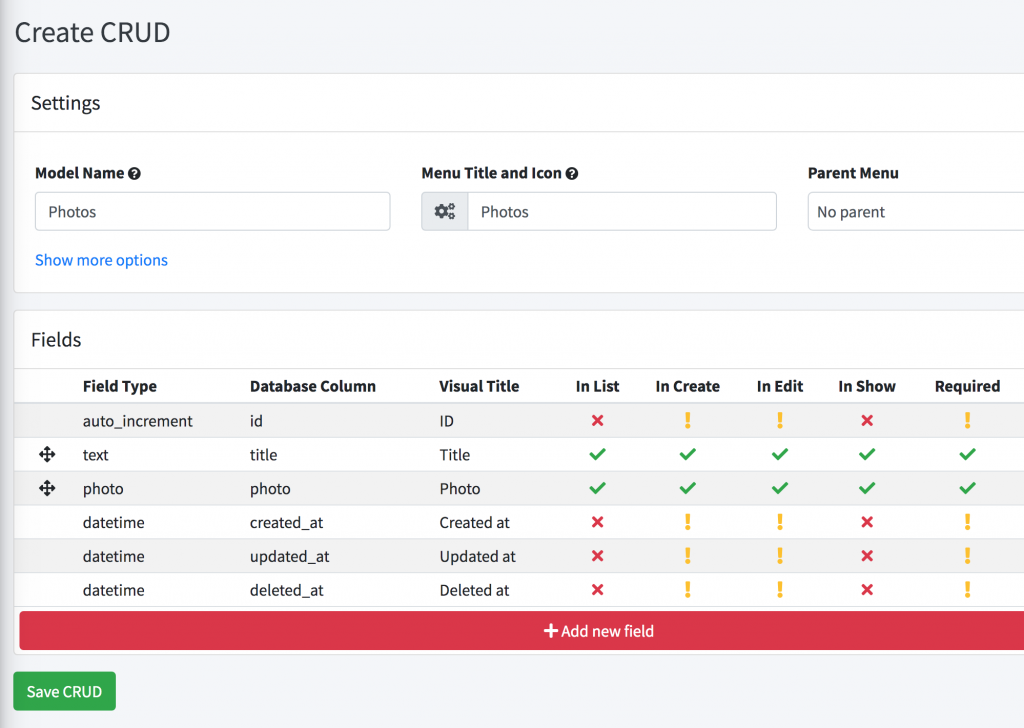
We create a new CRUD called “Photos” with only two fields – “title” (string field type) and “photo” (photo field type).
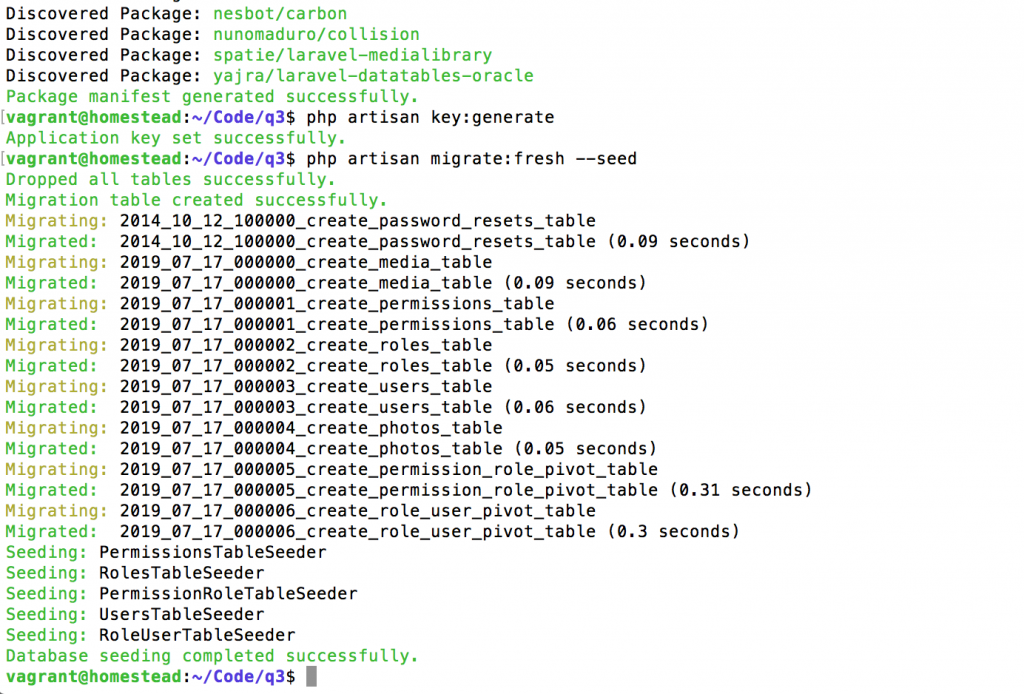
And that’s it for this phase: we download the project and install it locally with a few typical commands:
– .env file – credentials
– composer install
– php artisan key:generate
– php artisan migrate –seed
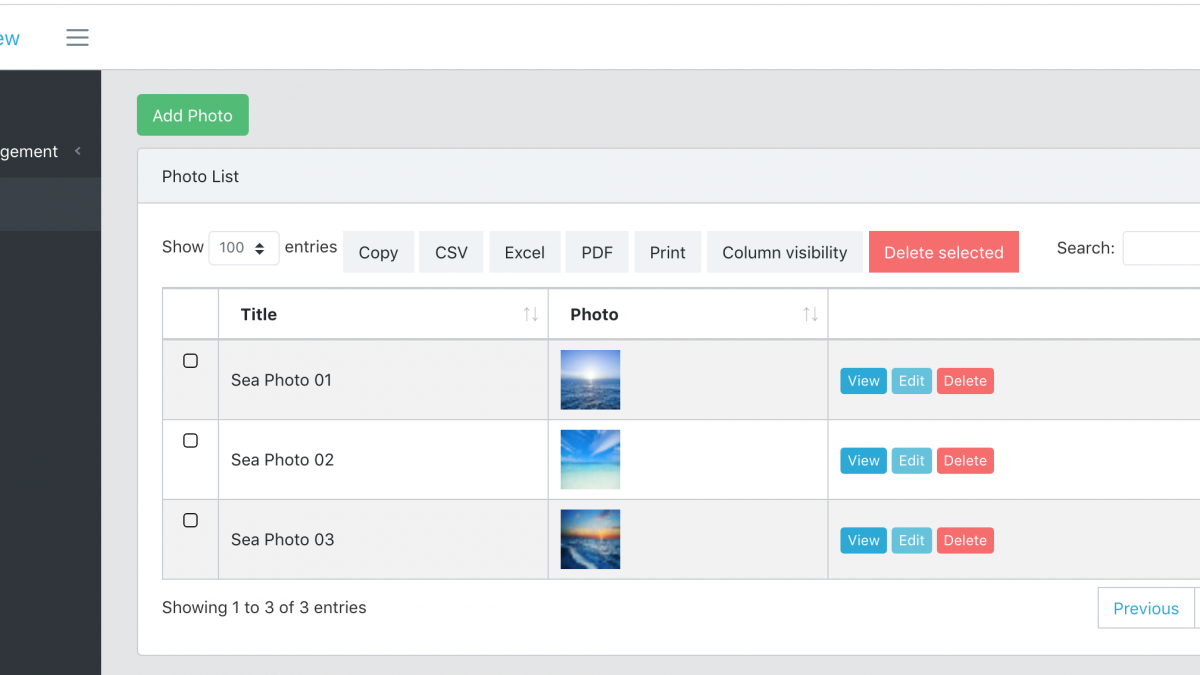
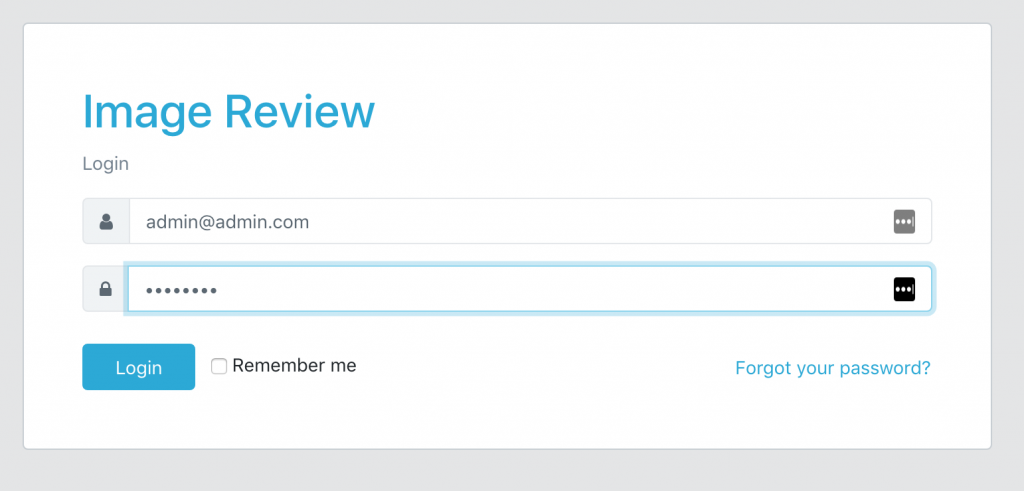
Here’s our visual result, after we login and add a few photos as administrator:

From here, we will continue with custom Laravel code.
Step 2. Roles/Permissions and new “Reviewer” role
As I mentioned above, default QuickAdminPanel comes with two roles: “Administrator” and “User”. The only actual difference between them, is that User cannot manage other Users. But both can access all other CRUDs.
This system is based on users/roles/permissions structure in DB tables, here are a few screenshots:
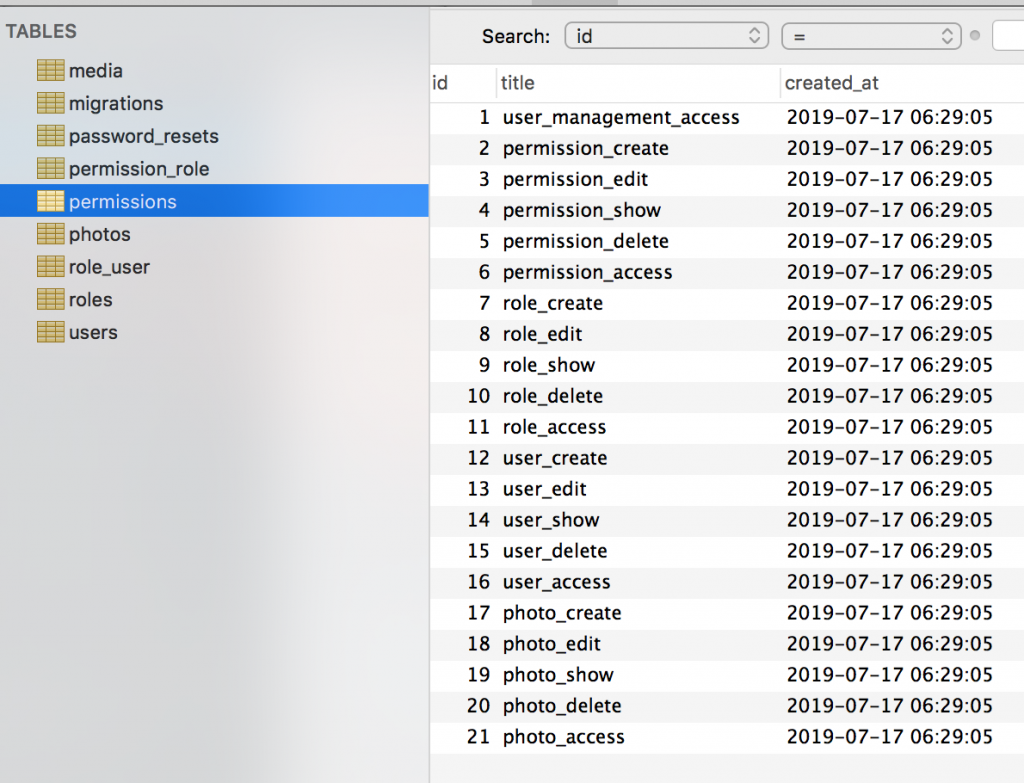
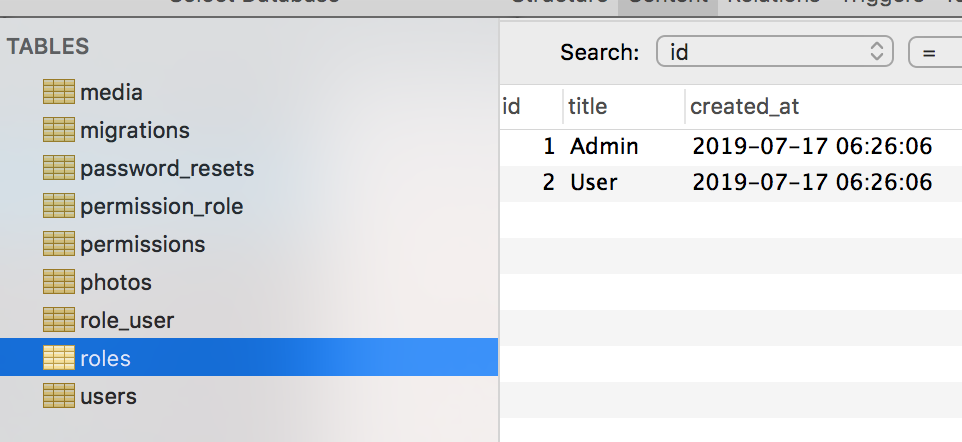
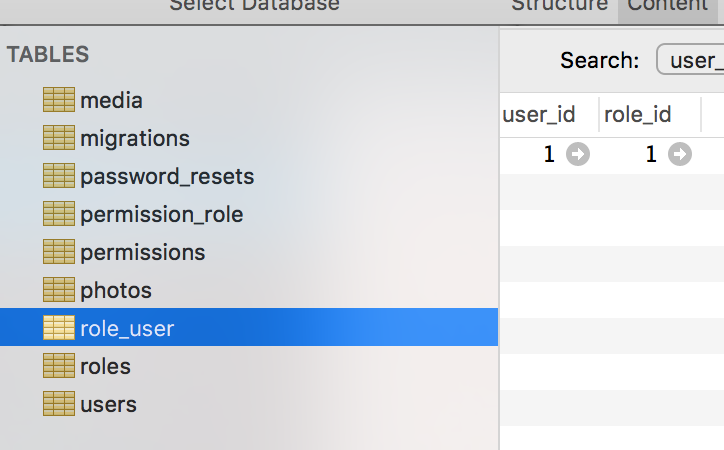
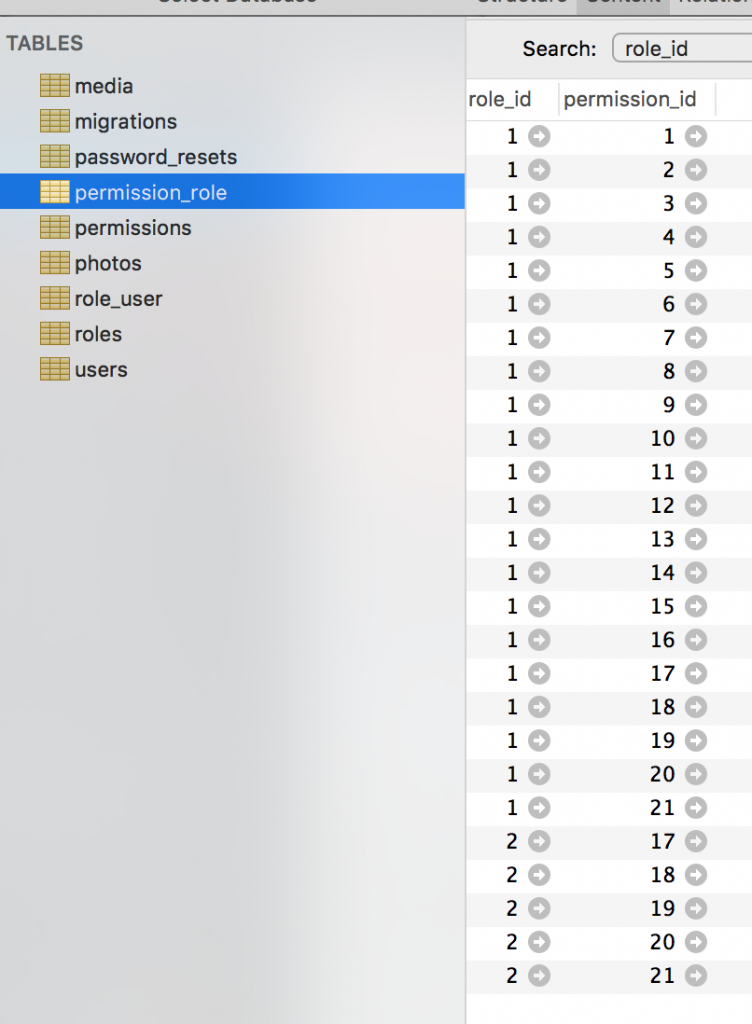
It’s pretty simple. You can read more about our roles/permissions system in this article or watch this popular video.
Now, we need to add a “Reviewer” role here with a permission to review photos, right?
We will do that by adding new entries in database/seeds seeder files, which were generated by QuickAdminPanel.
database/seeds/RolesTableSeeder.php:
class RolesTableSeeder extends Seeder
{
    public function run()
    {
        $roles = [
            [
                'id'         => 1,
                'title'      => 'Admin',
                'created_at' => '2019-06-30 14:24:02',
                'updated_at' => '2019-06-30 14:24:02',
                'deleted_at' => null,
            ],
            [
                'id'         => 2,
                'title'      => 'User',
                'created_at' => '2019-06-30 14:24:02',
                'updated_at' => '2019-06-30 14:24:02',
                'deleted_at' => null,
            ],
            [
                'id'         => 3,
                'title'      => 'Reviewer',
                'created_at' => '2019-06-30 14:24:02',
                'updated_at' => '2019-06-30 14:24:02',
                'deleted_at' => null,
            ],
        ];

        Role::insert($roles);
    }
}
Next, for every CRUD we generate 5 permissions – access, create, edit, show and delete. We need to add 6th one to “photos” area. We also will do it in the seed.
database/seeds/PermissionsTableSeeder.php:
class PermissionsTableSeeder extends Seeder
{
    public function run()
    {
        $permissions = [
            [
                'id'         => '1',
                'title'      => 'user_management_access',
                'created_at' => '2019-06-30 14:24:02',
                'updated_at' => '2019-06-30 14:24:02',
            ],

            // ... all other permissions

            [
                'id'         => '17',
                'title'      => 'photo_create',
                'created_at' => '2019-06-30 14:24:02',
                'updated_at' => '2019-06-30 14:24:02',
            ],
            [
                'id'         => '18',
                'title'      => 'photo_edit',
                'created_at' => '2019-06-30 14:24:02',
                'updated_at' => '2019-06-30 14:24:02',
            ],
            [
                'id'         => '19',
                'title'      => 'photo_show',
                'created_at' => '2019-06-30 14:24:02',
                'updated_at' => '2019-06-30 14:24:02',
            ],
            [
                'id'         => '20',
                'title'      => 'photo_delete',
                'created_at' => '2019-06-30 14:24:02',
                'updated_at' => '2019-06-30 14:24:02',
            ],
            [
                'id'         => '21',
                'title'      => 'photo_access',
                'created_at' => '2019-06-30 14:24:02',
                'updated_at' => '2019-06-30 14:24:02',
            ],
            [
                'id'         => '22',
                'title'      => 'photo_review',
                'created_at' => '2019-06-30 14:24:02',
                'updated_at' => '2019-06-30 14:24:02',
            ],
        ];

        Permission::insert($permissions);
    }
}
Finally, we need to assign all “photos” permissions to our new “Reviewer” role. We also do that in the seeds, but with a little more magic – looping through permissions and assigning them all to all role, except user management related ones. Here’s the full code.
database/seeds/PermissionRoleTableSeeder.php:
class PermissionRoleTableSeeder extends Seeder
{
    public function run()
    {
        // Assign all permissions to administrator - role ID 1
        $admin_permissions = Permission::all();
        Role::findOrFail(1)->permissions()->sync($admin_permissions->pluck('id'));

        // Reviewer permissions are same as administrator except user management
        $reviewer_permissions = $admin_permissions->filter(function ($permission) {
            return substr($permission->title, 0, 5) != 'user_'
                && substr($permission->title, 0, 5) != 'role_'
                && substr($permission->title, 0, 11) != 'permission_';
        });
        Role::findOrFail(3)->permissions()->sync($reviewer_permissions);

        // Finally, simple user permission is same as reviewer but cannot review
        $user_permissions = $reviewer_permissions->filter(function ($permission) {
            return $permission->title != 'photo_review';
        });
        Role::findOrFail(2)->permissions()->sync($user_permissions);
    }
}
And now if we re-seed the database, we should have correct permissions:
php artisan migrate:fresh --seed
Step 3. Assigning a Reviewer to each new photo
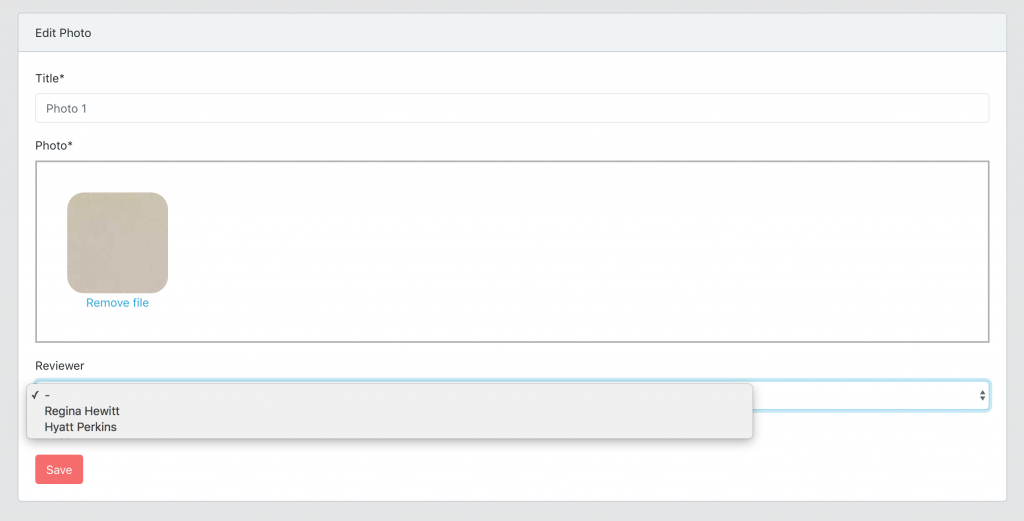
Next step – administrator can assign one reviewer while editing photo edit:
app/Http/Controllers/Admin/PhotosController.php:
public function edit(Photo $photo)
{
    abort_unless(\Gate::allows('photo_edit'), 403);
    $reviewers = Role::findOrFail(3)->users()->get();

    return view('admin.photos.edit', compact('photo', 'reviewers'));
}
And then showing the dropdown of potential reviewers.
resources/views/admin/photos/edit.blade.php:
<form action="{{ route("admin.photos.update", [$photo->id]) }}"
    method="POST" enctype="multipart/form-data">
    @csrf
    @method('PUT')

    <div class="form-group {{ $errors->has('title') ? 'has-error' : '' }}">
        <label for="title">{{ trans('cruds.photo.fields.title') }}*</label>
        <input type="text" id="title" name="title" class="form-control"
            value="{{ old('title', isset($photo) ? $photo->title : '') }}" required>
        @if($errors->has('title'))
            <em class="invalid-feedback">
                {{ $errors->first('title') }}
            </em>
        @endif
        <p class="helper-block">
            {{ trans('cruds.photo.fields.title_helper') }}
        </p>
    </div>

    <div class="form-group {{ $errors->has('photo') ? 'has-error' : '' }}">
        <label for="photo">{{ trans('cruds.photo.fields.photo') }}*</label>
        <div class="needsclick dropzone" id="photo-dropzone">

        </div>
        @if($errors->has('photo'))
            <em class="invalid-feedback">
                {{ $errors->first('photo') }}
            </em>
        @endif
        <p class="helper-block">
            {{ trans('cruds.photo.fields.photo_helper') }}
        </p>
    </div>

    @can('user_management_access')
        <div class="form-group">
            <label for="reviewer">{{ trans('cruds.photo.fields.reviewer') }}</label>
            <select class="form-control
                {{ $errors->has('reviewer_id') ? 'has-error' : '' }}" id="reviewer" name="reviewer_id">
                <option value="">-</option>
                @foreach($reviewers as $reviewer)
                    <option value="{{ $reviewer->id }}"
                    @if(isset($photo) && $photo->reviewer_id == $reviewer->id) selected @endif>
                        {{ $reviewer->name }}</option>
                @endforeach
            </select>
            @if($errors->has('reviewer_id'))
                <em class="invalid-feedback">
                    {{ $errors->first('reviewer_id') }}
                </em>
            @endif
            <p class="helper-block">
                {{ trans('cruds.photo.fields.reviewer_helper') }}
            </p>
        </div>
    @endcan


    <div>
        <input class="btn btn-danger" type="submit" value="{{ trans('global.save') }}">
    </div>
</form>
Here’s the visual result:
And, of course, we need to add a new DB field: photos.reviewer_id which can be nullable, here’s the migration:
public function up()
{
    Schema::table('photos', function (Blueprint $table) {
        $table->unsignedInteger('reviewer_id')->nullable();
        $table->foreign('reviewer_id')->references('id')->on('users');
    });
}
Finally, we add it as $fillable in the model, with relationship to users table.
app/Photo.php:
class Photo extends Model implements HasMedia
{

    protected $fillable = [
        'title',
        'created_at',
        'updated_at',
        'deleted_at',
        'reviewer_id',
    ];

    public function reviewer()
    {
        return $this->belongsTo(User::class, 'reviewer_id');
    }

}
Our Controller uses $request->all() to save data, so we don’t need to change anything there – photo reviewer will be saved from the dropdown automatically.
Done here.
Step 4. Menu “Photos for Review” and list of photos
Ok, now we have roles/permissions and can assign reviewers to review photos. We probably need a new menu item for them to see that list of photos to review.
Here’s what we add to our sidebar menu:
resources/views/partials/menu.blade.php
<ul class="nav">

    <!-- ... other menus ... -->

    @can('photo_access')
        <li class="nav-item">
            <a href="{{ route("admin.photos.index") }}" class="nav-link
                {{ request()->is('admin/photos') || request()->is('admin/photos/*')
                    && !request()->is('admin/photos/review') ? 'active' : '' }}">
                <i class="fa-fw fas fa-cogs nav-icon">

                </i>
                {{ trans('cruds.photo.title') }}
            </a>
        </li>
    @endcan

    @can('photo_review')
        <li class="nav-item">
            <a href="{{ route("admin.photos.indexReview") }}" class="nav-link
                {{ request()->is('admin/photos/review') ? 'active' : '' }}">
                <i class="fa-fw fas fa-search nav-icon">

                </i>
                {{ trans('cruds.photo.review') }}
            </a>
        </li>
    @endcan

    <!-- ... other menus ... -->

</ul>
As you can see, we already are using @can(‘photo_review’) permission from the previous step, so simple users won’t see that menu item.
And now, let’s actually implement it.
routes/web.php:
Route::group([
  'prefix' => 'admin',
  'as' => 'admin.',
  'namespace' => 'Admin',
  'middleware' => ['auth']
], function () {
    // ... other admin routes
    Route::get('photos/review', 'PhotosController@indexReview')
      ->name('photos.indexReview');
    Route::resource('photos', 'PhotosController');
});
So we have new URL photos/review, keep in mind this extra URL should come before Route::resource statement, not after, otherwise it will conflict with photos/{photo} which is show() method in Controller.
Ok, let’s get to Controller:
app/Http/Controllers/Admin/PhotosController.php:
public function indexReview()
{
    abort_unless(\Gate::allows('photo_review'), 403);
    $photos = Photo::reviewersPhotos()->get();

    return view('admin.photos.index', compact('photos'));
}
See the part of Photo::reviewersPhotos()? This is a way to filter out only photos to review by a logged-in reviewer. And for this, we will use Eloquent Query Scopes.
In app/Photo.php we add this:
public function scopeReviewersPhotos($query)
{
    return $query->where('reviewer_id', auth()->id());
}
And that’s it. Blade file resources/views/admin/photos/index.blade.php for the photos list is pretty simple, but big, so won’t post it here, you will find it in the repository – link to Github at the end of the article.
Step 5. Approving the photo – approved_at field and checkbox
Now, we need to work on actually approving the photo. For that, we will visually add a checkbox in the edit form. But in the database, we will save it as datetime field approved_at – it’s much more informative to save WHEN the action was done, instead of just true/false value.
Migration file:
public function up()
{
    Schema::table('photos', function (Blueprint $table) {
        $table->datetime('approved_at')->nullable();
    });
}
New $fillable and $dates in app/Photo.php model:
class Photo extends Model implements HasMedia
{
    protected $dates = [
        'created_at',
        'updated_at',
        'deleted_at',
        'approved_at',
    ];

    protected $fillable = [
        'title',
        'created_at',
        'updated_at',
        'deleted_at',
        'approved_at',
        'reviewer_id',
    ];

    // ...
}
One more checkbox field in Edit form, shown only if you have that permission:
resource/views/admin/photos/edit.blade.php:
@can('photo_review')
    <div class="form-group">
        <div class="form-check">
            <input type="checkbox" class="form-check-input"
              id="approved" name="approved_at"
              @if(isset($photo->approved_at)) checked @endif>
            <label for="approved"
              class="form-check-label">{{ trans('cruds.photo.fields.approved') }}</label>
        </div>
        <p class="helper-block">
            {{ trans('cruds.photo.fields.approved_helper') }}
        </p>
    </div>
@endcan
And we process it in app/Http/Controllers/Admin/PhotosController.php:
public function update(UpdatePhotoRequest $request, Photo $photo)
{
    abort_unless(\Gate::allows('photo_edit'), 403);
    $request['approved_at'] = $request->input('approved_at', false)
      ? Carbon::now()->toDateTimeString()
      : null;

    $photo->update($request->all());

    return redirect()->route('admin.photos.index');
}
Step 6. Viewing approved photos on the homepage
Finally, for guest visitors we need to show photos on the homepage, but only approved ones. Another scope!
app/Photo.php
public function scopeApproved($query)
{
    return $query->whereNotNull('approved_at');
}
Then, route to homepage in routes/web.php:
Route::get('/', 'FrontController@index')->name('front.home');
Next, app/Http/Controllers/FrontController.php:
public function index()
{
    $photos = Photo::approved()->get();
    return view('front.index', compact('photos'));
}
And finally, code for the front page.
resources/views/front/index.blade.php:
@extends('layouts.front')

@section('content')
<div class="container">
    <div class="row justify-content-center">
        <div class="col-md-10">
            <div class="card">
                <div class="card-header">{{ trans('cruds.photo.title') }}</div>

                <div class="card-body">
                    @if (session('status'))
                        <div class="alert alert-success" role="alert">
                            {{ session('status') }}
                        </div>
                    @endif
                    <div class="container-fluid">
                        <div class="row">
                            @forelse ($photos as $photo)
                                <div class="col-md-3 mb-2">
                                    @if($photo->photo)
                                        <a href="{{ $photo->photo->getUrl() }}" target="_blank">
                                            <img src="{{ $photo->photo->getUrl() }}" class="img-thumbnail" width="150px">
                                        </a>
                                    @endif
                                </div>
                            @empty
                                <div class="w-100">
                                    <p class="text-center">{{ trans('panel.empty') }}</p>
                                </div>
                            @endforelse
                        </div>
                    </div>
                </div>
            </div>
        </div>
    </div>
</div>
@endsection
Visual result:

There is some magic with getUrl() method for the photo, you will find all explanations to this in the repository (see below).
So, with this project I wanted to show you:
- How to implement and customize roles/permissions in Laravel
- How to use Eloquent Scopes to filter data
- Side goal: how easy it is to start admin project with QuickAdminPanel
Here’s the link to the repository that contains all the code from the above, plus Multi-Tenancy implementation, so every user would see only their photos.
Enjoy: https://github.com/LaravelDaily/Demo-Laravel-Image-Reviewers
