Lesson 3. Menu and Routes
 Povilas Korop
Founder of QuickAdminPanel
Mini-course: How To Create Admin Panel in Laravel 5.4
- Lesson 1. Laravel and Default Auth
- Lesson 2. CRUDs, Migrations and Models
- Lesson 3. Menu and Routes
- Lesson 4. Index, List Table and Pagination
- Lesson 5. Create, Update Entries and Validation
- Lesson 6. Deleting Entries and Some JavaScript
- Lesson 7. Roles, Permissions and Authorization
- Lesson 8. Do It All Much Quicker with QuickAdminPanel
Ok, we’ve created our database and model, now it’s time to go to the visual side and create a menu item.
Menu items
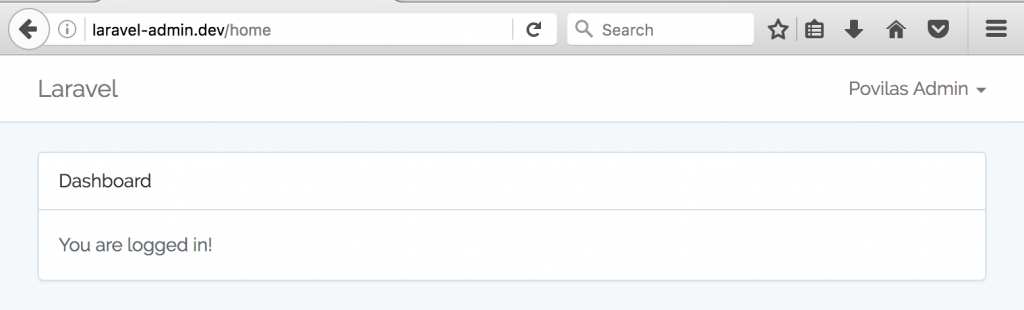
I will remind you how our “admin panel” (still empty) looks now – it is based on a popular Bootstrap framework:
So we need to create menu items somewhere on top. Guess what – Laravel has already prepared that list for us to fill in!
If you look at the file /resources/views/layouts/app.blade.php you will see this:
    <div class="collapse navbar-collapse" id="app-navbar-collapse">
        <!-- Left Side Of Navbar -->
        <ul class="nav navbar-nav">

        </ul>

        <!-- Right Side Of Navbar -->
        <ul class="nav navbar-nav navbar-right">
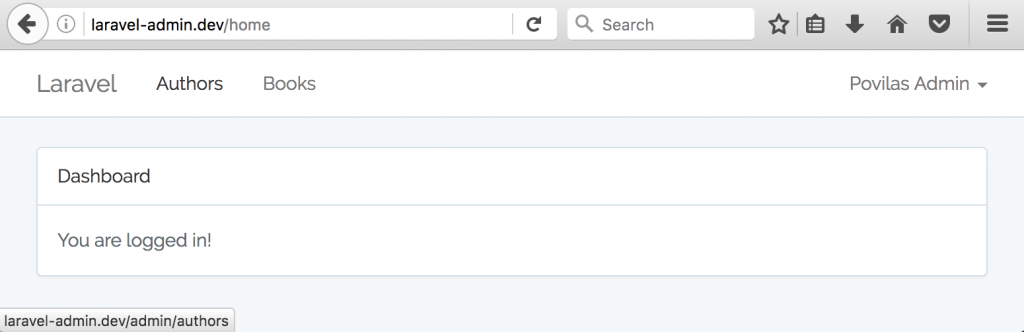
See that “Left Side Of Navbar” list? It’s empty, so all we need to do is to add our <lt> items there. Let’s do exactly that:
    <!-- Left Side Of Navbar -->
    <ul class="nav navbar-nav">
    	<li><a href="/admin/authors">Authors</a></li>
    	<li><a href="/admin/books">Books</a></li>
    </ul>
And look what we have now:
Routes
Now, we need to create a rule that those URLs /admin/authors and /admin/books would point to the right place. For that, we open file routes/web.php and add this block:
Route::group(['middleware' => 'auth', 'prefix' => 'admin'], function () {
    Route::resource('authors', 'AuthorsController');
    Route::resource('books', 'BooksController');
});
As you can see, each CRUD is represented by one Controller which is also called “resourceful” – we will create and fill it in the next lesson.
Also pay attention to Route::group block and its parameters:
- ‘middleware’ => ‘auth’ parameter – it means that only logged in users will be able to access the URLs that are inside.
- ‘prefix’ => ‘admin’ means that all URLs inside will be prefixed with /admin/ (like /admin/authors) – so that then in Route::resource() we don’t have to add that prefix to every URL.
Basic Controller
And now – let’s generate the Controller. Yes, there’s Artisan command for that. Even a special one for resource controllers that we’re gonna use:
php artisan make:controller AuthorsController --resource
This is the generated file app/Http/Controllers/AuthorsController.php
namespace App\Http\Controllers;

use Illuminate\Http\Request;

class AuthorsController extends Controller
{
    /**
     * Display a listing of the resource.
     *
     * @return \Illuminate\Http\Response
     */
    public function index()
    {
        //
    }

    /**
     * Show the form for creating a new resource.
     *
     * @return \Illuminate\Http\Response
     */
    public function create()
    {
        //
    }

    /**
     * Store a newly created resource in storage.
     *
     * @param  \Illuminate\Http\Request  $request
     * @return \Illuminate\Http\Response
     */
    public function store(Request $request)
    {
        //
    }

    /**
     * Display the specified resource.
     *
     * @param  int  $id
     * @return \Illuminate\Http\Response
     */
    public function show($id)
    {
        //
    }

    /**
     * Show the form for editing the specified resource.
     *
     * @param  int  $id
     * @return \Illuminate\Http\Response
     */
    public function edit($id)
    {
        //
    }

    /**
     * Update the specified resource in storage.
     *
     * @param  \Illuminate\Http\Request  $request
     * @param  int  $id
     * @return \Illuminate\Http\Response
     */
    public function update(Request $request, $id)
    {
        //
    }

    /**
     * Remove the specified resource from storage.
     *
     * @param  int  $id
     * @return \Illuminate\Http\Response
     */
    public function destroy($id)
    {
        //
    }
}
So this is a skeleton for all actions for the CRUD. In the next lesson we will fill in the first method – index().
- Lesson 1. Laravel and Default Auth
- Lesson 2. CRUDs, Migrations and Models
- Lesson 3. Menu and Routes
- Lesson 4. Index, List Table and Pagination
- Lesson 5. Create, Update Entries and Validation
- Lesson 6. Deleting Entries and Some JavaScript
- Lesson 7. Roles, Permissions and Authorization
- Lesson 8. Do It All Much Quicker with QuickAdminPanel